
Google Analytics recently updated their permissions. Site owners who would like access to their site’s analytics will need to enable their Google Analytics account on their WordPress site.
We highly recommend setting up Google Analytics—it’s quick and easy. Having access to the full spectrum of analytics allows you to make data driven decisions about your site’s content and architecture. A few features you’ll also be able to track are your most popular pages/posts and referral traffic to the site.
Our team can provide you more site support in the future if you have historical data. This includes analyzing trends in web traffic, determining bounce rates, common searches, and more.
If you’ve used Analytics in the past or have another account in our network please see this post: Adding New Accounts for Current Analytics Users
Step 1. Signing In
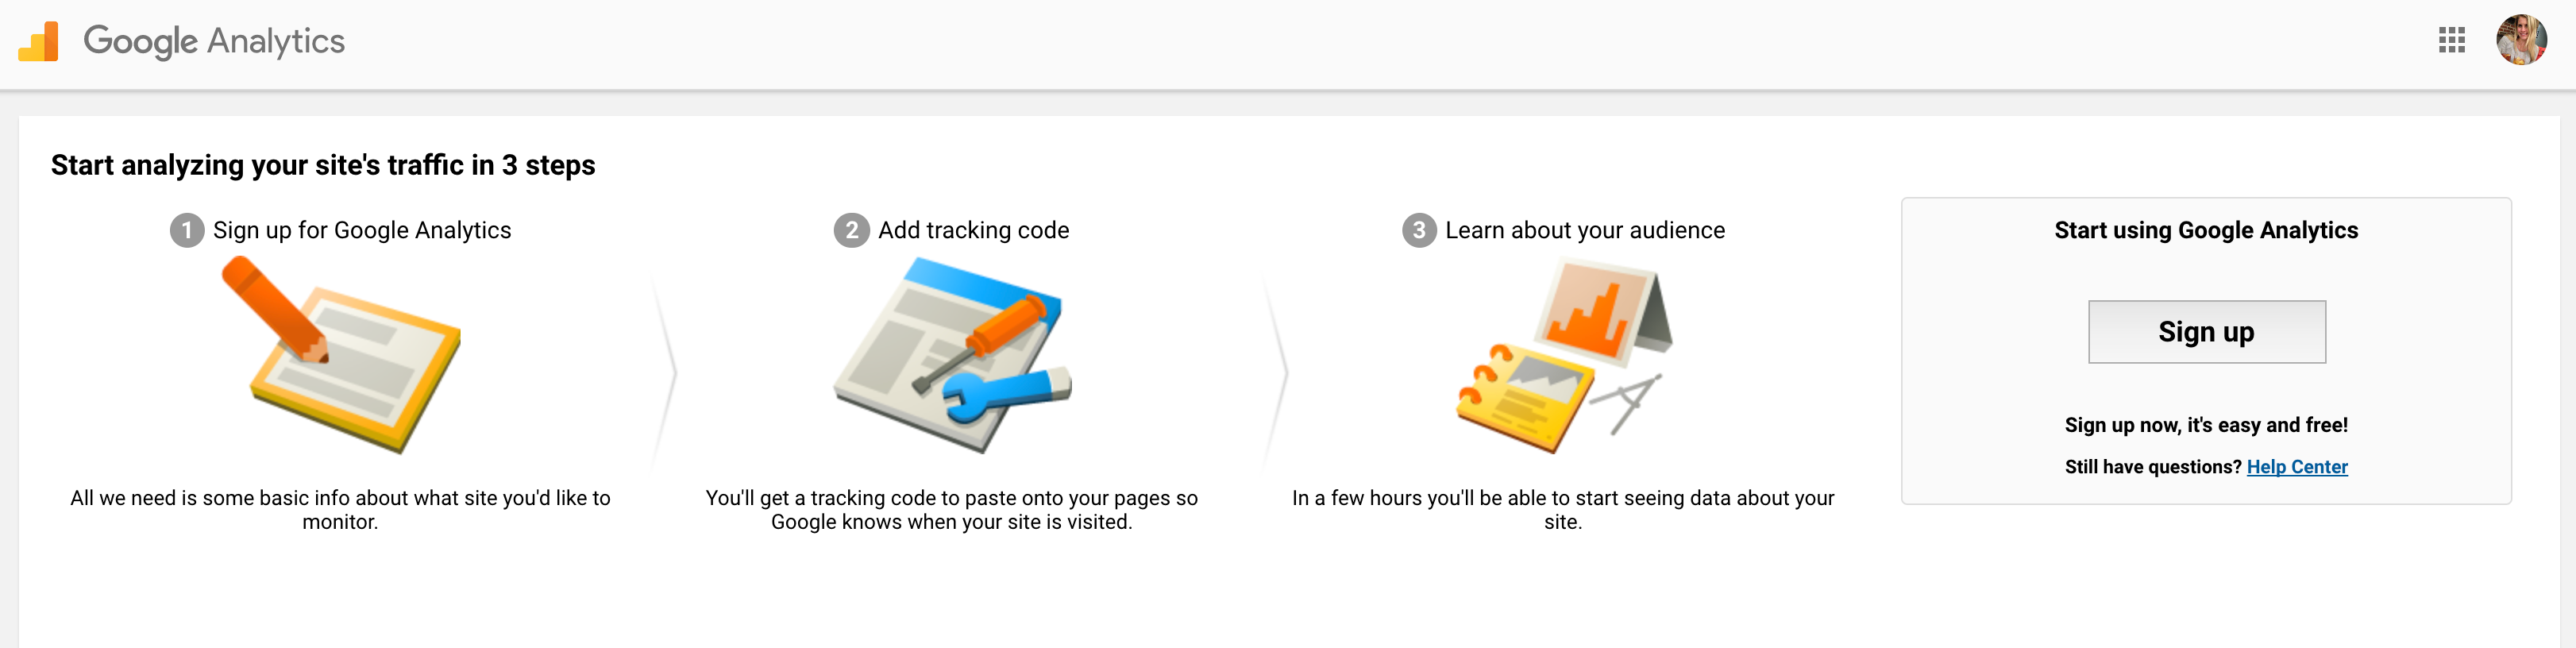
Go to analytics.google.com. If you are already logged into your umich gmail account in that browser it will automatically log you in and you’ll be presented with an Analytics Dashboard [ Figure 2 ].
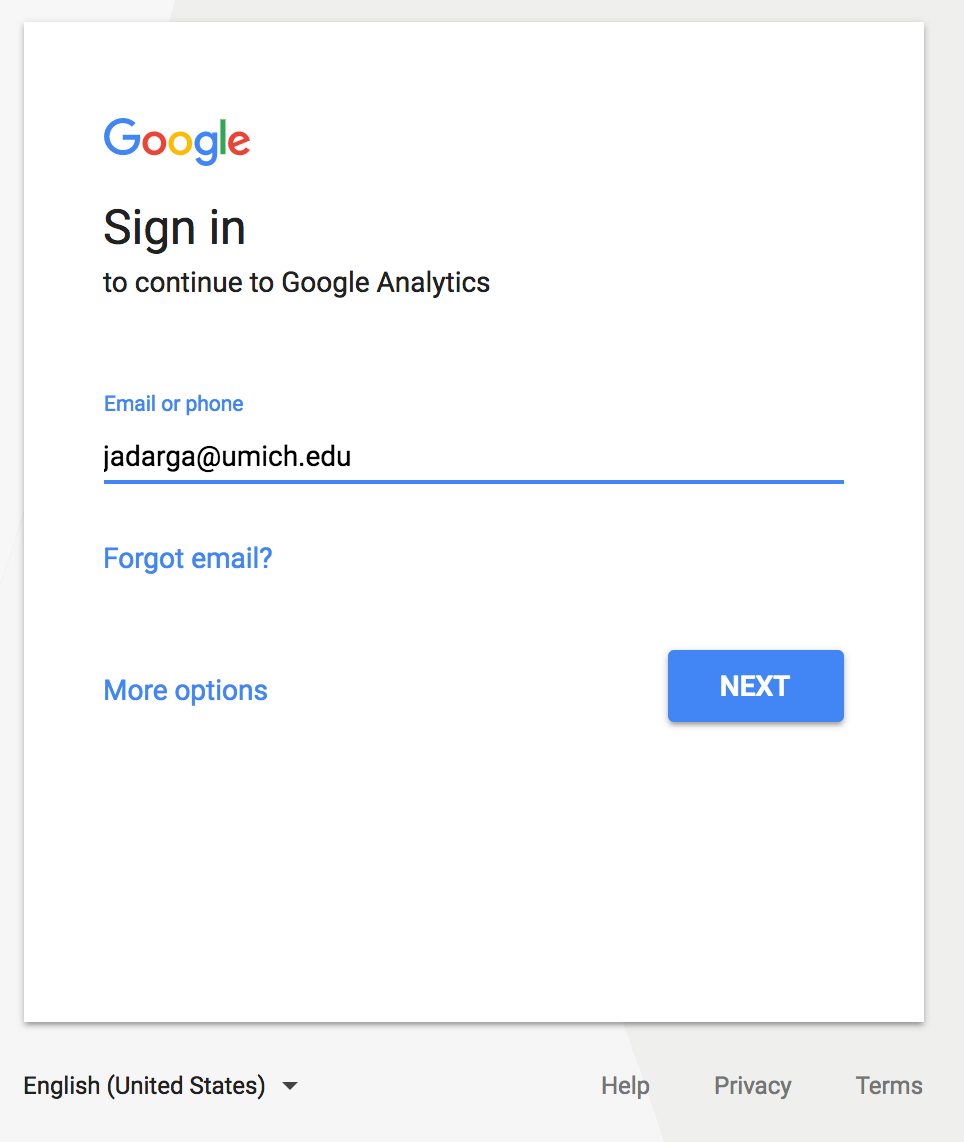
If you’re not already signed into your email then enter your umich email and click next [Figure 1]. It will transport you to the umich gateway page to sign in with your uniqname and Kerberos password.

Step 2. Sign Up
If you’ve never used Google Analytics before it will prompt you to sign up. See this screenshot in Figure 2 below:

Click “Sign up”
**If you’ve used Analytics before and are presented instead with a Dashboard upon signing in, please see this post: Analytics for Non-First Time Users**
Step 3. Create Account
After clicking “Sign up” you’ll be presented with a New Account page. This is where you add information about your site. For example:
- Account Name = the title of the site
- Website Name = the title of the site
- Website URL = sites.lsa.umich.edu/… (omit the https://)
- Industry category = “Jobs & Education”
- Reporting Time Zone = Eastern Time
- Leave the boxes checked
- Click the “Get Tracking ID” button
See Figure 3 for example:

Important: Accept the “Terms of Service” pop up to retrieve your tracking ID [Figure 4].

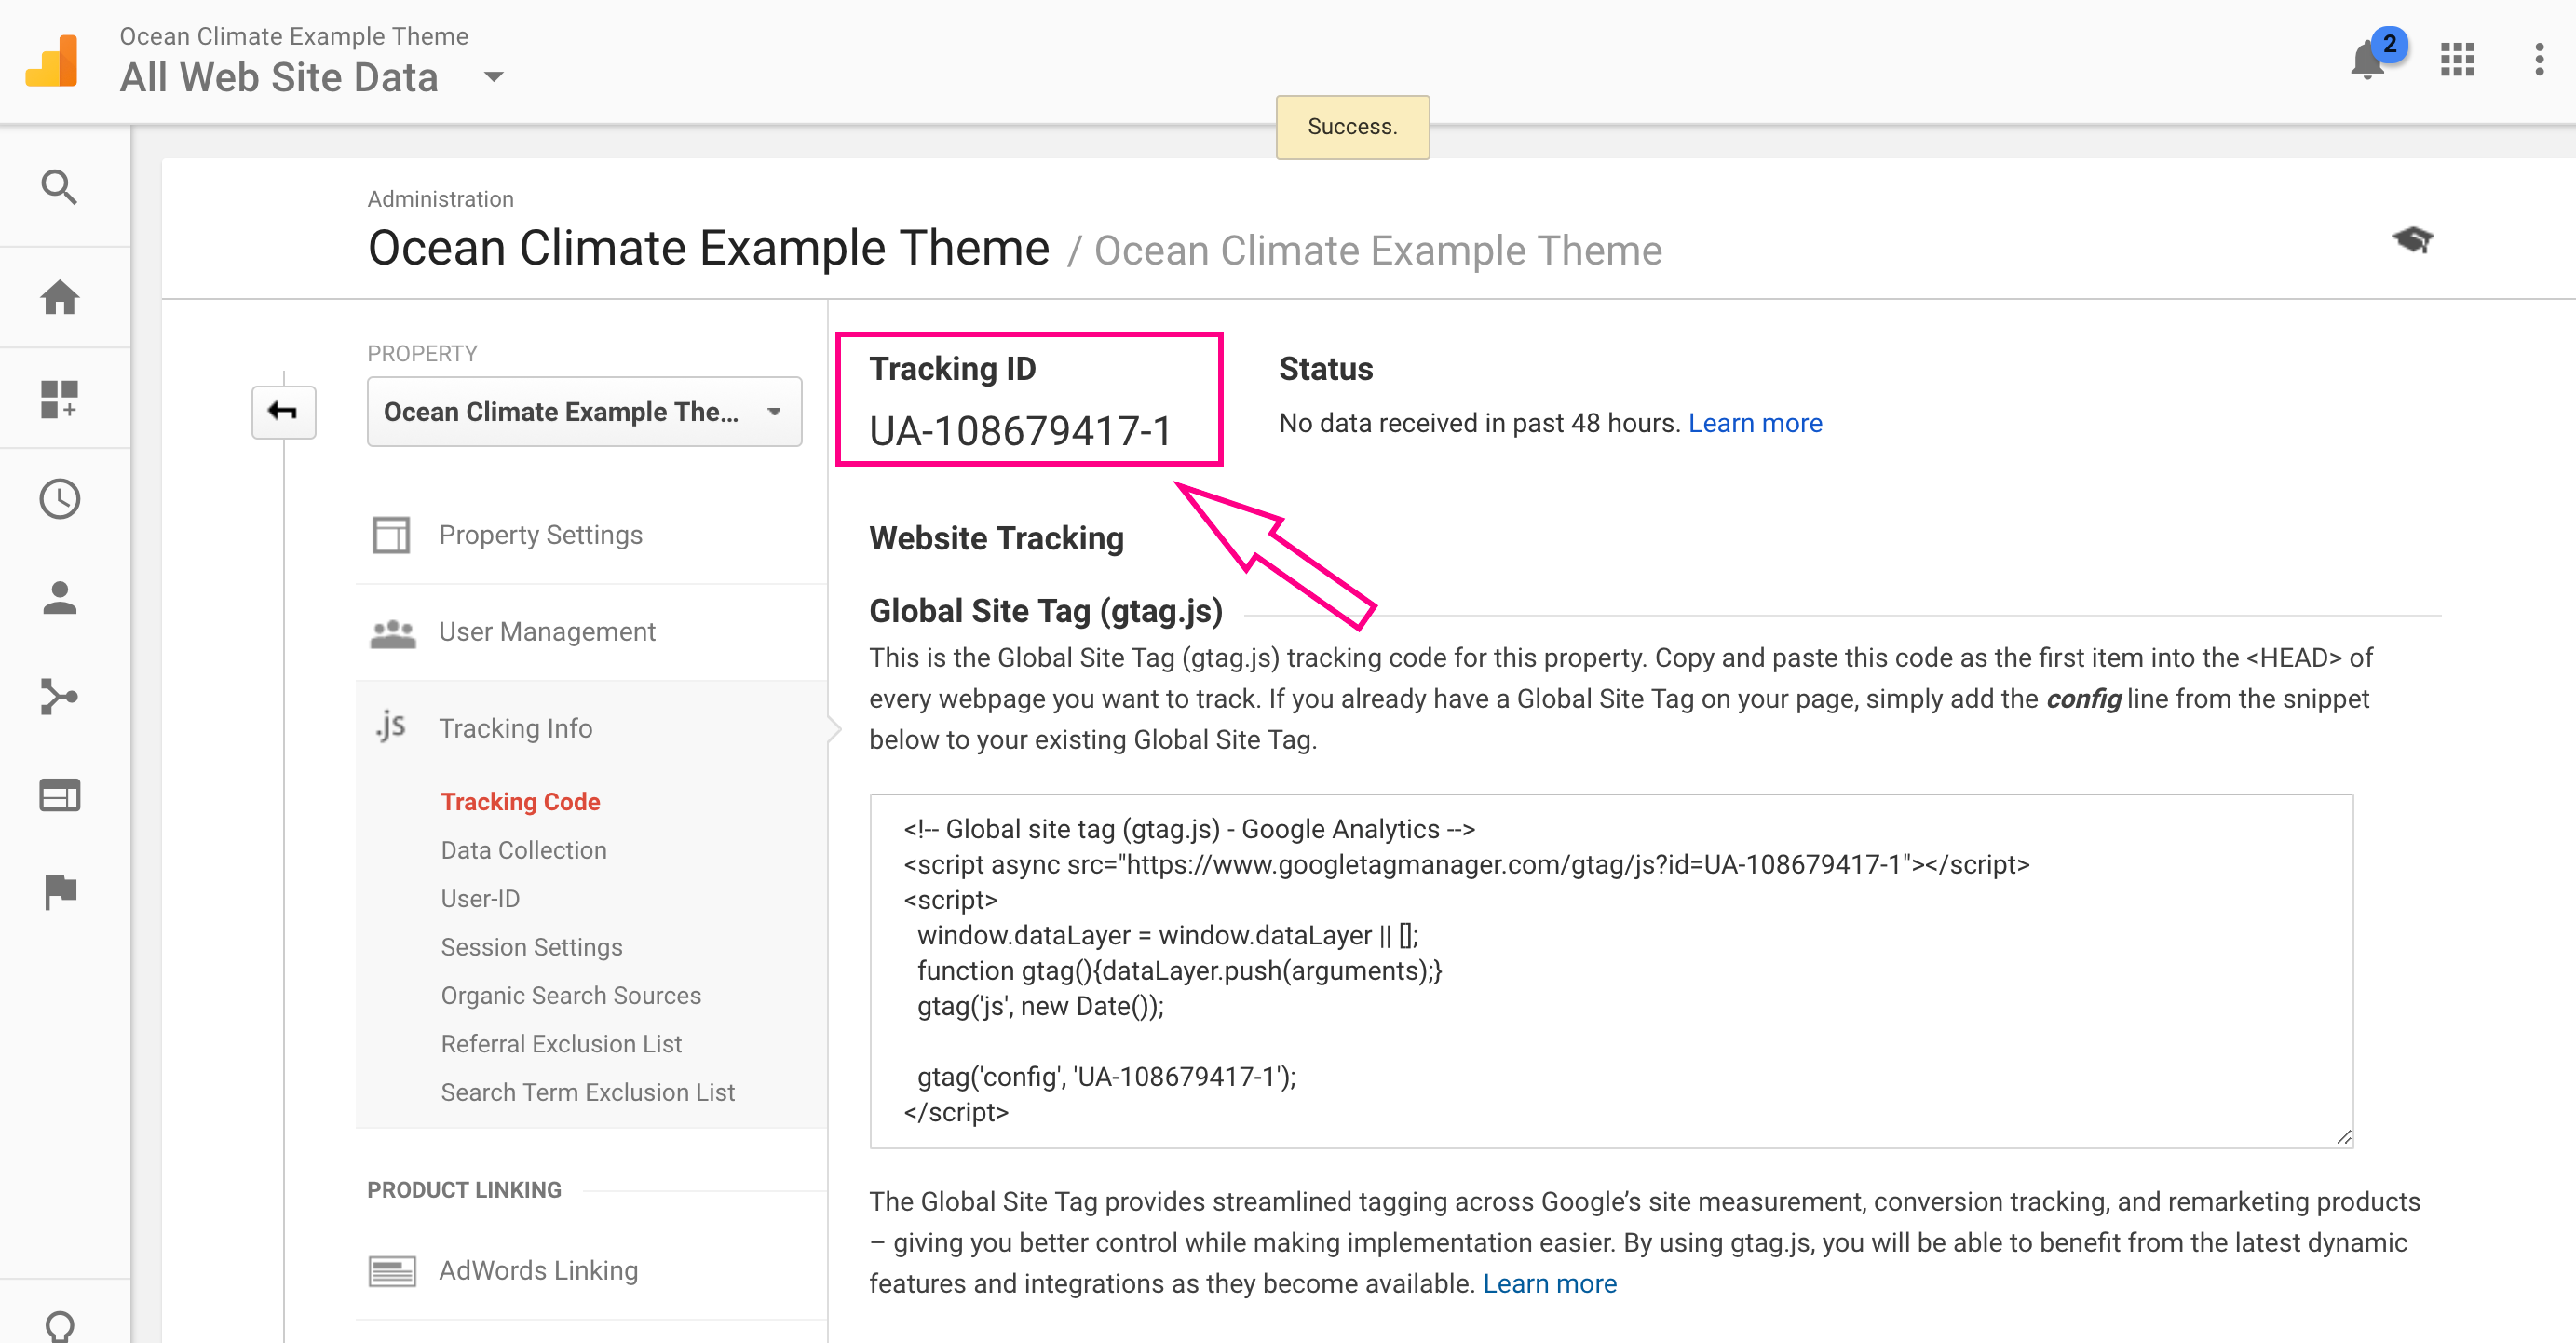
Step 4. Copy Your Tracking ID and Add it to Your WordPress Site
Copy to your clipboard the tracking ID that pops up once accepting the terms of service. It will look something like this: UA-108745775-1. Here is a screenshot of where to find it [Figure 5]:

Open up your WordPress dashboard and navigate to “Settings / Google Analytics” [Figure 6].

Paste your Tracking code in the “Tracking Code ID” field and click SAVE CHANGES at the bottom. You can leave all the default settings as is. Screenshot below [Figure 7]:

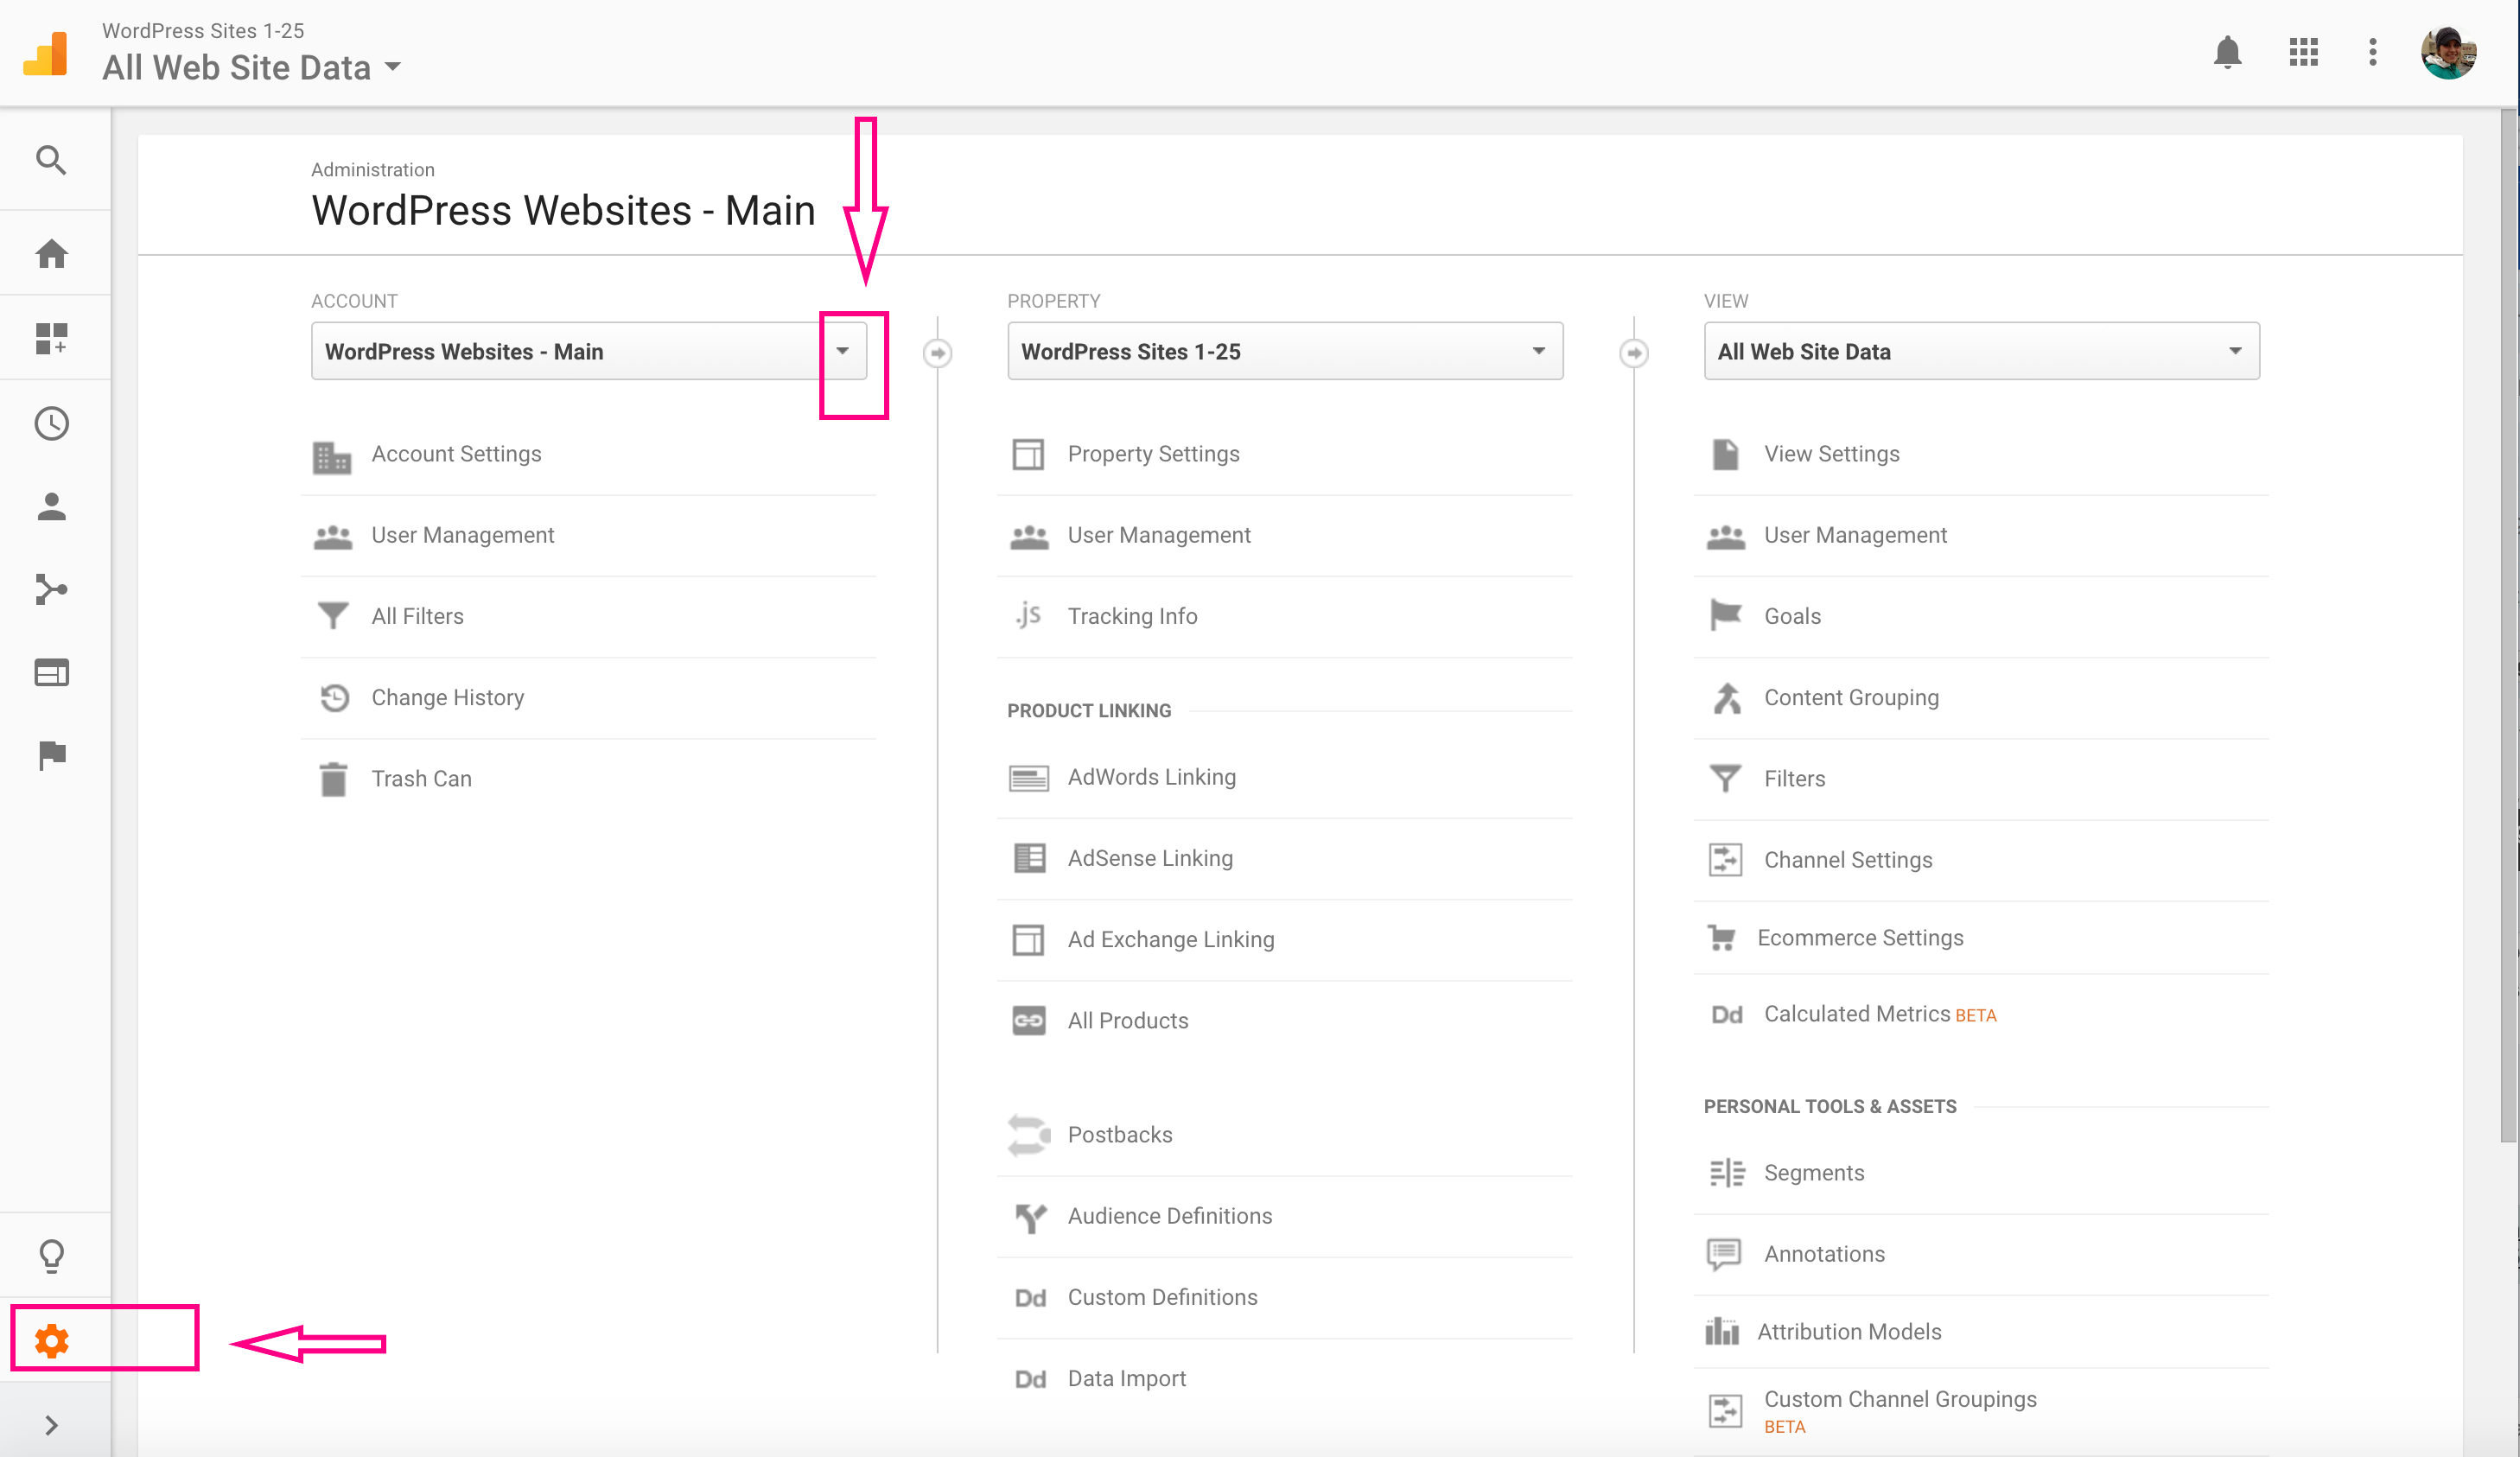
Step 5. Optional: Add Other Admins to Your Analytics Account
Back in your analytics account window. Click on the admin Cog icon (lower left side) to make sure you’re at the base level Administration page. See Figure 8 below:

Once back on Admin view level of your Analytics dashboard. Click on the “User Management” tab [Figure 9]:

Under “Add permission for:” enter the full email address of the other people you’re granting analytics access. Selecting all of the fields will give them access to the full account. Then click “Add.” You do not have to check the box to “notify them by email.”
For new users that now have access to the Analytics account they can see the data by logging into analytics.google.com with their umich email.
For questions regarding these steps please email lsa.web.support@umich.edu. You can also go over these steps in our Open Lab.

